User manual
This page contains a short description of the main features of the app.
Table of contents
- Home screen
- Side menu
- Post detail
- Community detail
- Instance detail
- User detail
- Explore
- Profile
- Inbox
- Settings
- Moderation log
- Moderation tools
Home screen
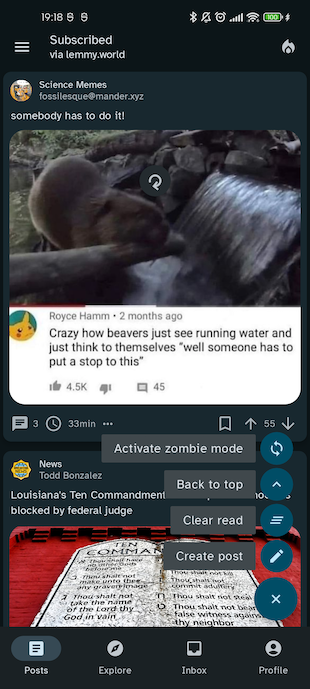
The home screen displays the timeline and it is made up by three components:
- the top bar where you can see the feed type (“All” or “Local”), the instance name “via …” and the sort type;
- the post list, where for each post you can see the community and creator info, its title, image (if any), URL (if any), number of comments, most recent modification date and the vote;
- the bottom navigation bar, from which you can navigate to other application sections.
The format of each post item (card, compact or full) and the vote format (aggregated, separated, percentage) as well as the font size/face can be configured in the Settings screen.
If you are logged, you can save posts and vote then (with either a positive or a negative vote). You will also find more options in the “…” button.
If you open the menu of the floating action button in the bottom right corner, you can go back to the top or activate the “zombie mode” (i.e. automatic scrolling).
If you are logged, the floating action button contains an option to hide read posts — a post is considered read when you have voted or saved it, opened its detail, opened its image or (if you enabled the “Mark read while scrolling” option in the Settings screen) just seen it in the feed.

Side menu
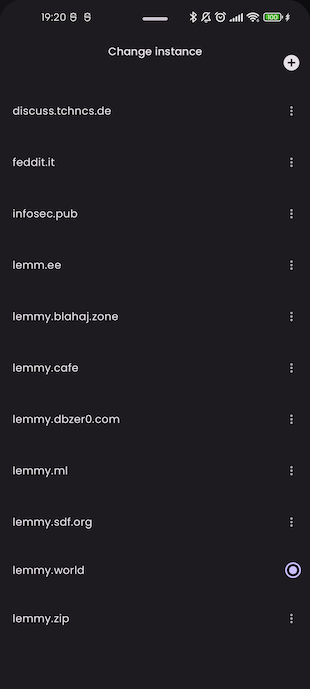
In anonymous mode, the side menu gives you the opportunity to change instance (the same menu can be accessed by tapping the “via …” label in the home top bar).
If your preferred instance is not listed, you can add a new one using the “+” button. It is possible to reorder items in this list to arrange how instances are displayed.
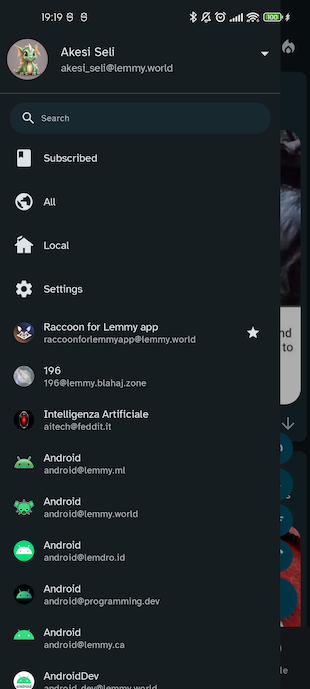
If you are logged, the side menu allows to see the list of subscriptions, with the ones that you marked as favorite to the top of the list. You can use the search field to look for a specific community.
By clicking on each item, you will open the corresponding community or multi-community detail.
Post detail
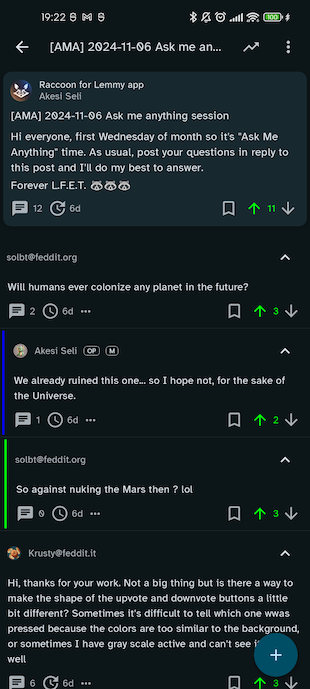
By selecting a post you can open the corresponding detail screen.
The detail screen shows the post creator and community info, title, cover image, URL, score and date but also the textual body of the post if it is present.
After the post you can see the comments, each of which displays the creator, date, number of replies and vote.
By using the “…” button you can access an additional menu about the post, e.g. you can see the raw Markdown and inspect/copy its contents.
If you are logged, you can vote or save both the main post and all its comments.
Community detail
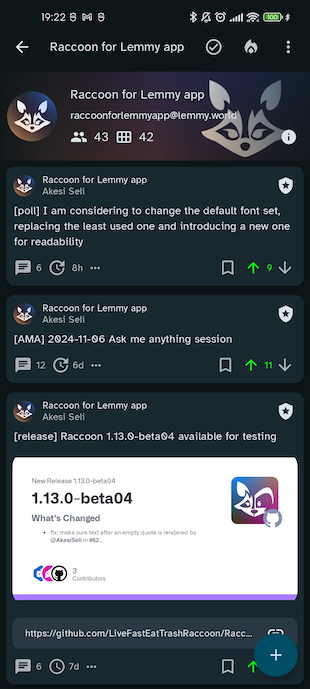
By tapping on the community info above each post title, you can open the community detail screen, which is very similar to the home screen (you can activate the zombie mode here too).
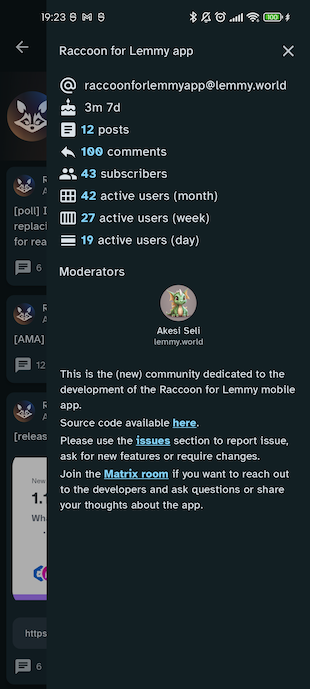
If you tap on the “⋮” button in the top right corner you can also access some additional information and, if you are logged and are a moderator for this community, you will be able to edit its metadata.
If you are logged, you can vote or save each post in the list and access the same post actions which you can find in the home screen timeline.
Instance detail
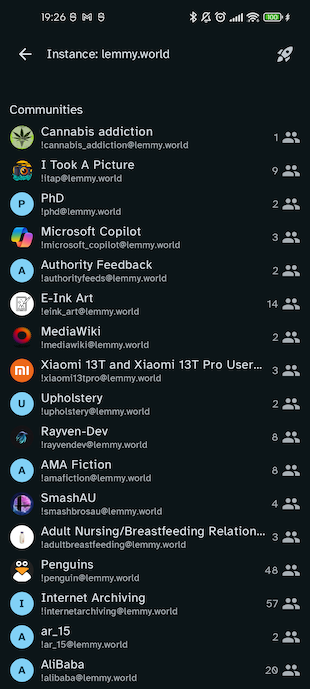
From the “⋮” button of a community detail you can open the “Instance detail” page which shows a list of the communities in this instance (as well as a short description of the instance if it is available). This is useful because you can sort communities and explore the instance.
User detail
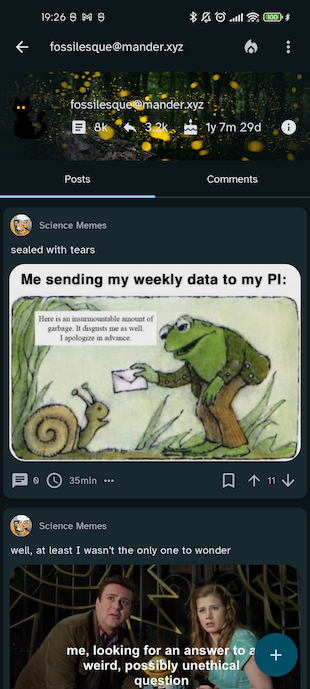
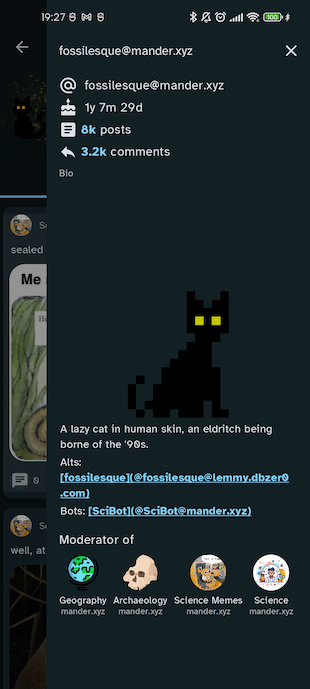
If you tap on the user name or avatar shown in the header of each post or comment, you will access the user detail screen where it is possible to see the posts and comments created by that particular user.
By using the “⋮” button in the top right corner you can also access some additional information.
Explore
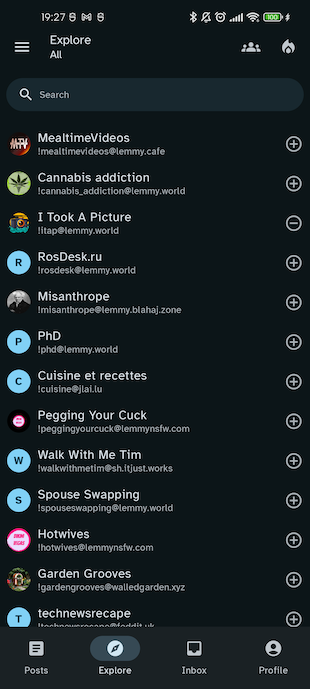
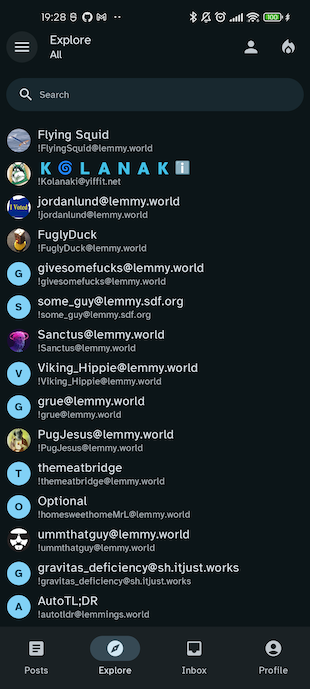
The explore screens allows you to search Lemmy (among All or local feeds) for contents and filter by a query string and result type (post, comment, communities, users or everything).
You can change the result type with the second to last action in the top bar, the available options are:
- posts;
- communities;
- comments;
- users;
- URLs.
As in the home screen, you can change the sort type with the last action on the right in the top bar and, if you are logged, you can vote posts or save them.
Profile
The Profile screen shows the list of post and comments that you created and some textual statistics about your post and comment count and your Lemmy-birthday.
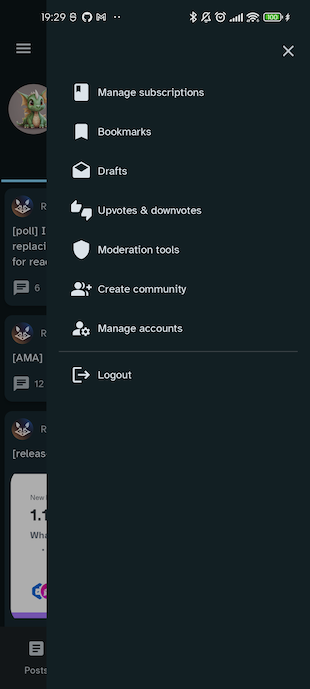
In top right corner an “open menu” button allows you to open a side menu which presents a series of shortcuts to access the following sections:
- Manage subscriptions: a screen where you can review your subscriptions and create multi-communities
- Saved: access the list of your saved items (posts and comments);
- Drafts: access the unfinished posts and comments that you have saved;
- Upvotes & downvotes: review the contents that you have liked or disliked;
- Moderation tools: if you are a moderator you can easily access:
- Report list: list of all the reports for posts and comments in your communities;
- Moderation log: global moderation log;
- Moderated contents: review all the contents that have been posted (either in the form of posts or comments) to your communities;
- Create community: if the instance you are logged in allows to create new communities, this button will open the community creation form;
- Manage accounts: to change account or access with a different one;
- Logout: terminate the current session and go back to anonymous mode.
In anonymous mode the profile is just a placeholder that invite you to access with an account or retry the login if your token has expired.

Inbox
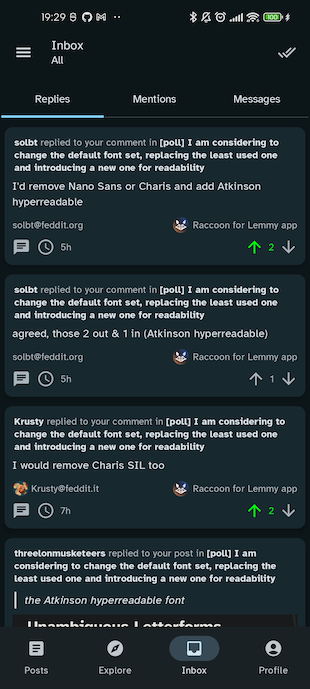
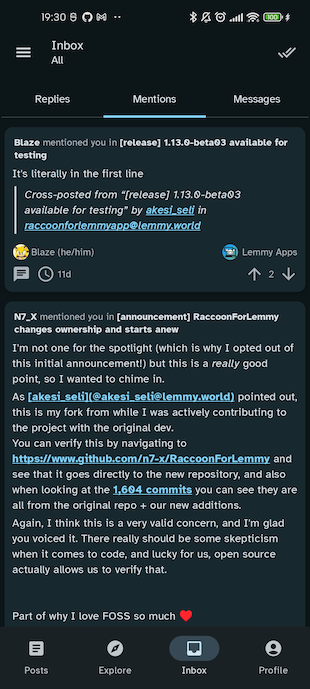
The Inbox screen is divided into three sections:
- Replies: contains the comments that were created as a reply to your post or comments;
- Mentions: contains the contents where your user has been mentioned by other users;
- Messages: contains the direct messages that other users have sent to you, grouped by users as a chat.
You can select (using the top bar) which filter to apply, i.e. whether all items should be included or just unread ones.
In anonymous mode the profile is just a placeholder that invite you to access with an account.
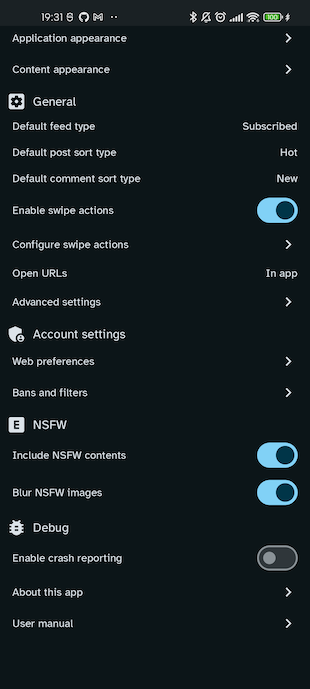
Settings
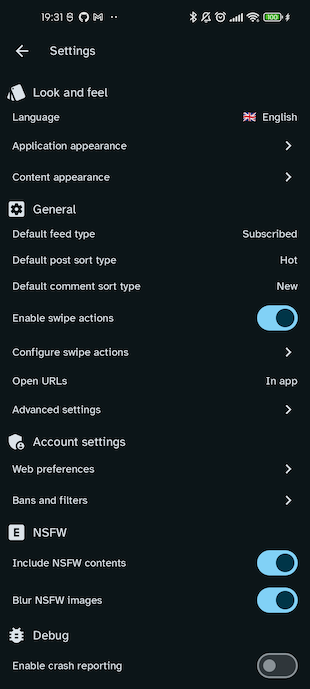
The settings screen allows you to customize the look and behaviour of your app.
- Look and feel:
- Language: choose UI language (app specific);
- UI theme: choose between light, dark, totally dark or system theme;
- Application appearance: opens the configuration screen for colors and fonts of the user interface;
- Content appearance: opens the configuration screen for fonts and style of posts and comments;
- General:
- Default feed type: listing type for the home screen applied by default
- Default post sort type: sort type for the home, community detail and user detail applied by default;
- Default comment sort type: sort type for post detail applied by default to comments in post detail;
- Enable swipe actions: (only for logged users) whether the swipe to left/right actions are enabled in post and comment list, inbox and report list;
- Configure swipe actions: (only for logged users) opens the configure swipe actions screen;
- Open URLs in external browser: rely on the external browser, custom tabs or in-app web view;
- Advanced settings: opens a detailed configuration screen for more advanced options;
- Account settings (only for logged users):
- Web preferences: allows you to edit your Lemmy account preferences;
- Bans and filters: configure user/community/instance/domain ban and filtering options in the dedicated screen.
- NSFW:
- Include NSFW contents: determine whether NSFW contents are included in the feed by default;
- Blur NSFW images: in home feed and community (unless the community is marked as NSFW as a whole) and user detail when a post is marked as NSFW, and the URL contains an image, the image is blurred;
- Debug:
- Enable crash reporting: if this option is enabled, in case the application crashes you will find the stack trace in a file on your local device;*
- About this app: shows a dialog with the app versions and some useful shortcuts to reach out to the developers or other members of the community;
- User manual: opens the application manual online (this page).
* Look for a file named `crash_report.txt` in the Documents directory of the private storage area reserved for the app, e.g.
/sdcard/Android/data/com.livefast.eattrash.raccoonforlemmy.android.dev/files/Documents/crash_report.txt
via adb or the “Device Explorer” if you are using Android Studio.
Application appearance
This screen allows to configure colors and fonts of the UI:
- UI theme: allows to set the color set for the UI (e.g. light or dark);
- Use dynamic colors: (on Android 12+) generate a palette based on your background dominant color;
- Use random color: use a random theme color at each startup;
- Custom theme color: (requires “Use dynamic color” option to be off) generate a palette by choosing a seed color from a predefined list or custom color;
- Upvote color: (logged only) color of the upvote action (both used as a card background when swiping and to highlight the vote indicator when you have upvoted a content);
- Downvote color: (logged only) color of the downvote action (both used as a card background when swiping and to highlight the vote indicator when you have downvoted a content);
- Reply action color: (logged only) card background color for the reply action;
- Save action color: (logged only) card background color for the save action;
- Comment bar theme: palette of colors used to distinguish nested comments;
- UI font: typeface used for the app UI elements (menus, labels, etc.);
- UI text size: scale factor to apply to the app UI elements;

Content appearance
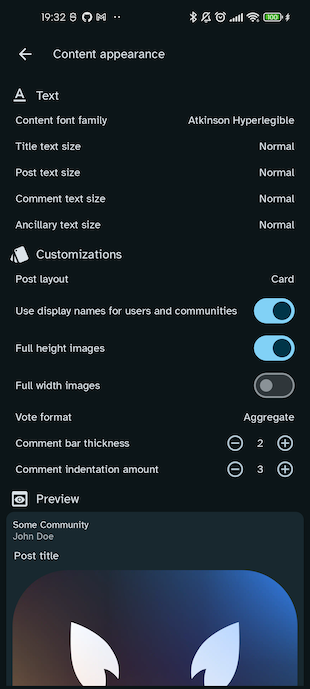
This screen is useful to configure the aspect of Lemmy contents (usernames, community names, post and comments).
- Text
- Content font family: typeface used for post and comments on Lemmy;
- Title text size: scale factor applied to post titles;
- Post text size: scale factor applied to post text;
- Comment text size: scale factor applied to comment text;
- Ancillary text size: scale factor applied to user names and other ancillary labels;
- Customizations:
- Post layout: choose a layout (Card, Compact, Full) for posts;
- Use display names for users and communities: if enabled, uses the user display name and the
community title whenever possible, otherwise fallbacks to Lemmy handles (
e.g.
!raccoonforlemmy@lemmy.world); - Full height images: show images with scaled width and full height (instead of capping the height) in the feed;
- Full width images: enables horizontal edge-to-edge for images in timelines;
- Vote format: see the score of posts and comments as aggregated (
upvotes - downvotes), split or percentage (upvotes / (upvotes + downvotes) * 100); - Comment bar thickness: allows to customize a multiplier applied to the width of comment bar indicating the depth on the left of each comment.
You can see a preview of the result below the list of options.
Advanced settings
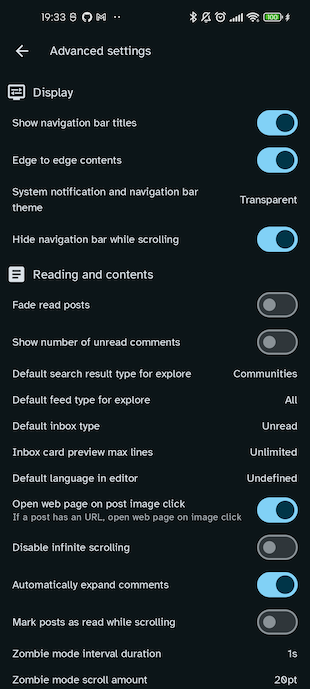
This screen contains a series of less frequently used customization options:
- Display:
- Show navigation bar titles: include the section titles in the bottom navigation bar;
- Edge to edge contents: enable the view from top to bottom edge for home, community detail, user detail, post detail and profile to maximize the space dedicated to contents;
- System notification and navigation bar theme: if you enable edge-to-edge display, choosing “ Transparent” makes the status and nav bar completely transparent, otherwise they have the system color with a slight alpha to make them more visible;
- Hide navigation bar while scrolling: makes the bottom navigation bar invisible while scrolling down to maximize the space dedicated to contents;
- Reading and contents:
- Default feed type for Explore: default listing type used in the Explore screen;
- Default inbox type: (logged only) whether the Inbox includes all contents by default of just unread ones;
- Default language in editor: language for newly created posts and comments;
- Disable infinite scrolling: if this option is enabled, instead of automatically fetching new contents while scrolling (in home, community detail, post detail, user detail) an explicit “Load more” button is shown, in order to prevent the “doom scrolling” effect;
- Automatically expand comments: expand all comment threads while opening the post detail;
- Mark posts as read when scrolling: (logged only) instead of marking posts read with an explicit interaction, posts are marked as read on the fly as they become visible while scrolling;
- Zombie mode interval duration: amount of time between automatic scroll in “lazy mode”;
- Zombie mode scroll amount: translation amount for the automatic scroll in “lazy mode”;
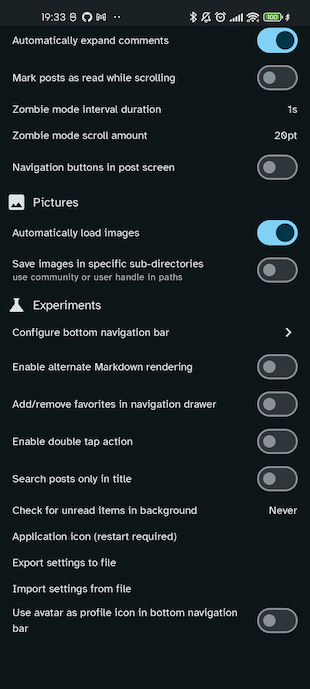
- Pictures:
- Automatically load images: load images and videos automatically in post and comments;
- Save images in specific subdirectories: use the community or user handle to save images when downloading them into your Gallery;
- Experiments:
- Configure bottom navigation bar: open a screen to reorder and add/remove items from the bottom navigation bar;
- Add/remove favorites in navigation drawer: enable the “favorites” section in the side menu;
- Enable double tap action: (logged only) instead of using swipe actions, this option activated the “double tap to like” mode some users may be familiar with from other social apps;
- Search posts only in title: enable exact match in the Explore section while searching posts;
- Check for unread items in background: refresh the Inbox in background to look for new
items;
- Application icon: allow to choose a different app icon;
- Export settings to file: save app settings to a JSON file on your device;
- Import settings from file: load app settings from a JSON file on your device;
- Use avatar as profile icon in bottom navigation bar: use your avatar instead of the default profile icon in the bottom navigation bar.
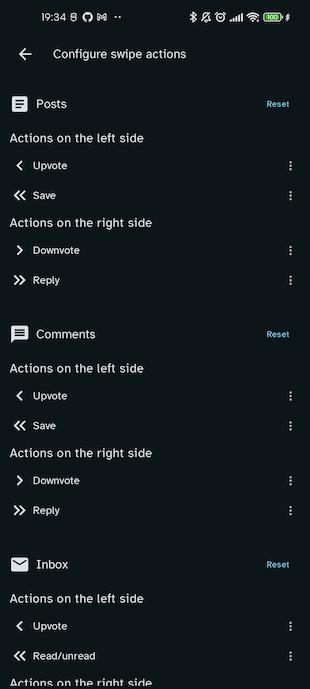
Configure swipe actions
In this screen it is possible to assign an action to the 4 slots (two on the left side and two on the right side) of the cards used to render post, comments and inbox items.
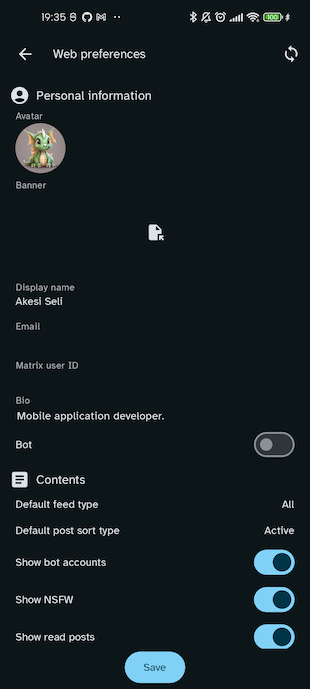
Web account settings
This screen lets you configure some preferences associated to your Lemmy account (similarly to what you can do on the webapp).
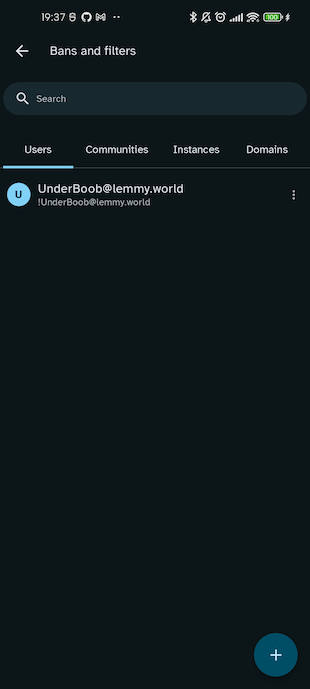
Ban and filters
This screen allows you to see what users, communities and instances you have blocked and remove the block (these settings are tied to your Lemmy account too).
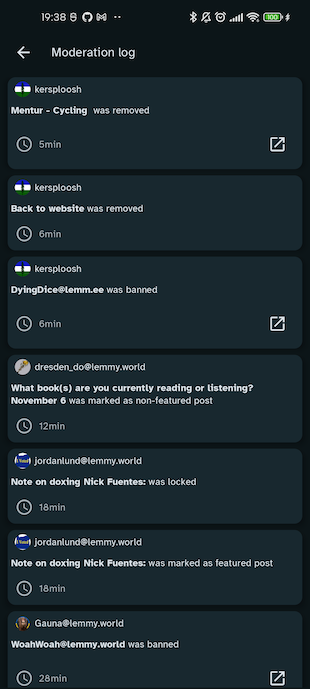
Moderation log
The moderation log can be accessed from the community detail using the “⋮” button. It contains a list of all the actions that happened for that given community, e.g.:
- users being promoted (or removed) to moderator;
- posts and comments being removed/restored;
- posts being locked (prevent further comments) or unlocked;
- posts being featured;
- comments being marked as distinguished;
- community being transferred.
Moderation tools
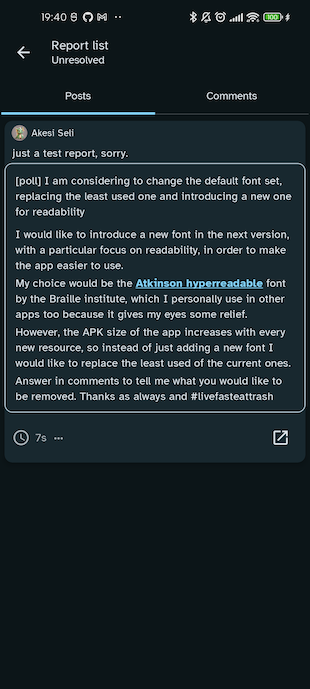
As a moderator, you can access the list of reports that users have submitted about posts and comments in your community. The report list can be accessed by the community detail, using the “⋮” button in the top right corner.
The report list screen can be filtered like the inbox (including all items or just unresolved ones) and it is divided in two sections:
- Posts: reported posts;
- Comments: reported comments;
For each report you can see the reason that was specified by the reporting users, you can open the content (e.g. to remove it) and you can mark the report as “resolved” once you are done with it.
